Use this page to guide you through creating, editing and deleting Switch sub-accounts.
Sub-accounts are the convenient and quick way for business owners to manage who in your team has permission to order products, view quotes and pay invoices.
This is particularly useful for delegating work to finance staff, your foreman, a project manager, or other key staff who have responsibility for the day-to-day operation of your business.
Step 1: Where to locate Sub-accounts
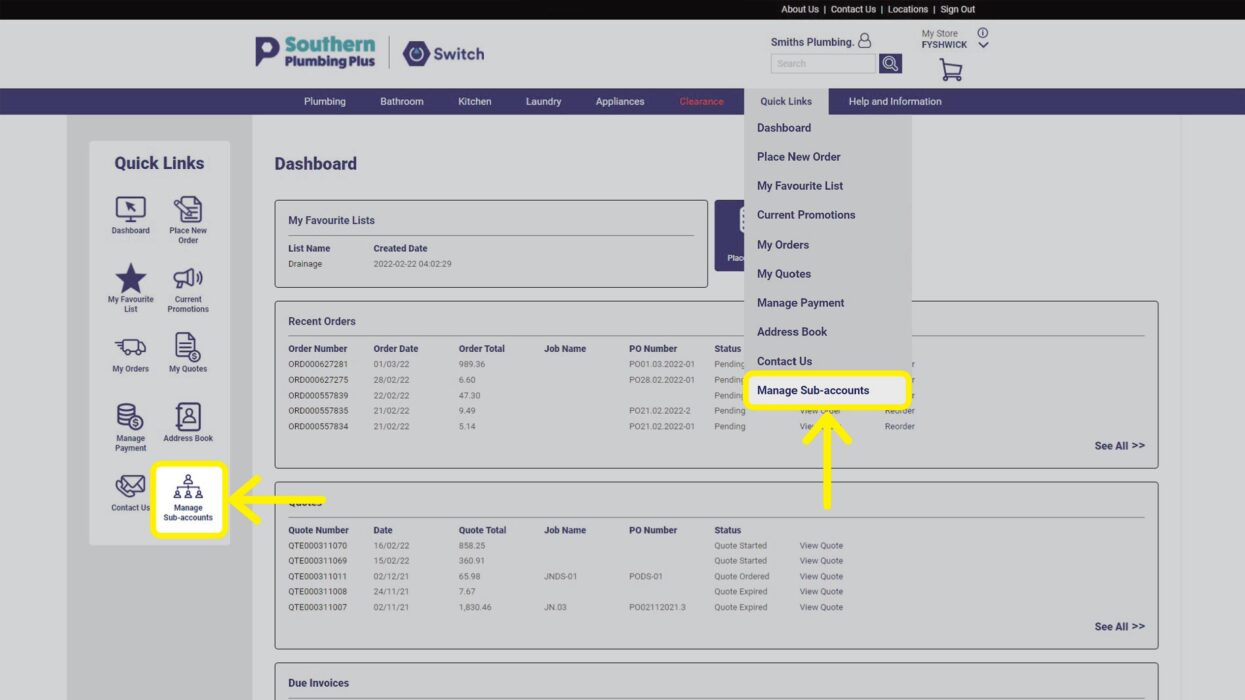
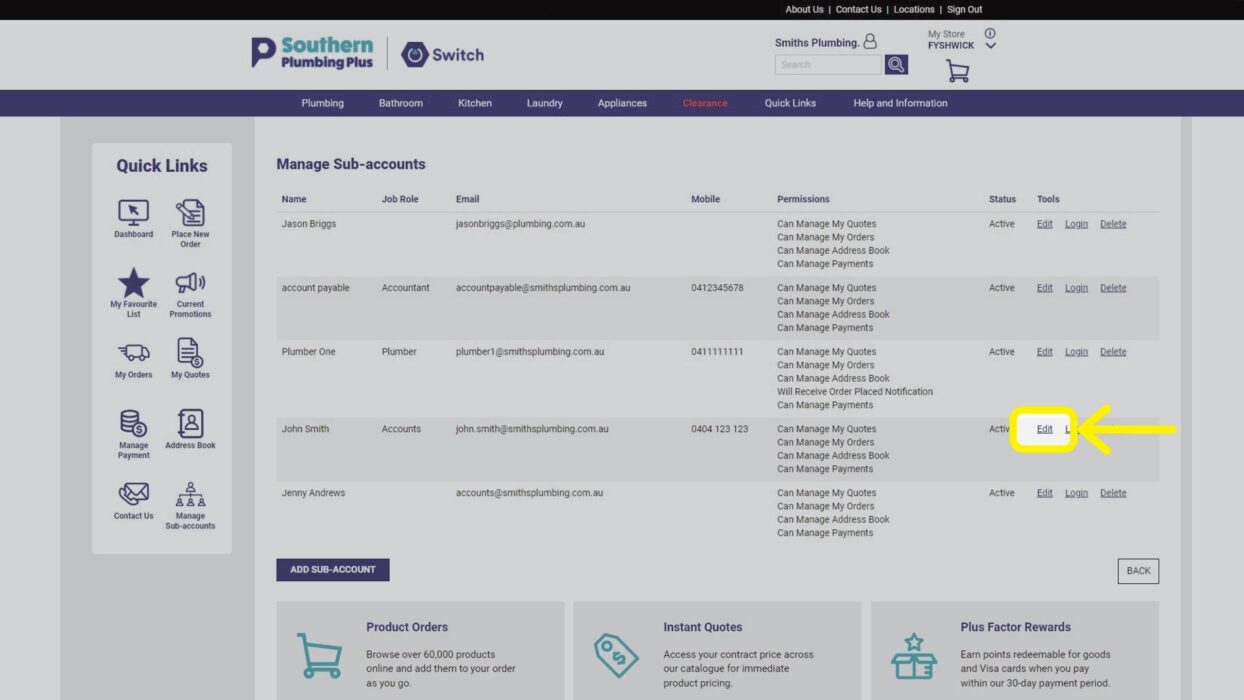
Manage Sub-accounts is located in the Quick Links icon bar found on your Dashboard, or in the Quick Links drop-down menu located in the main navigation.
Step 2: Adding Sub-accounts
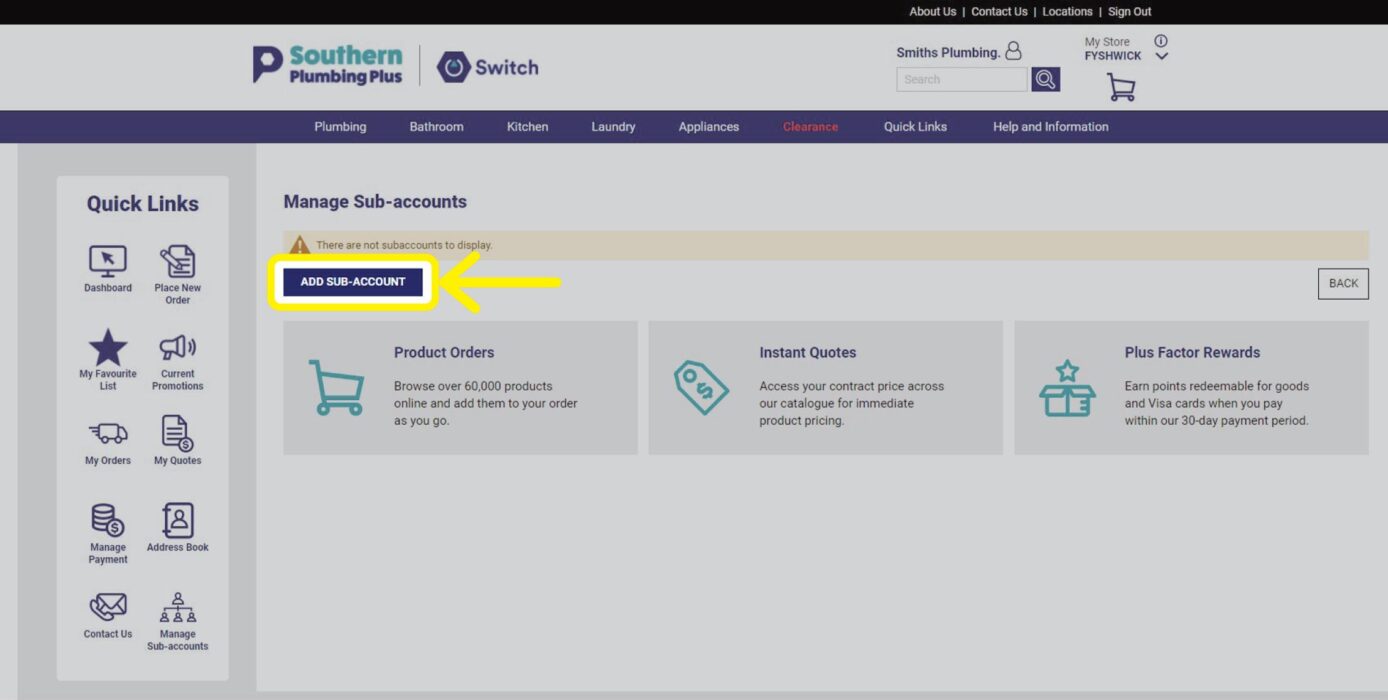
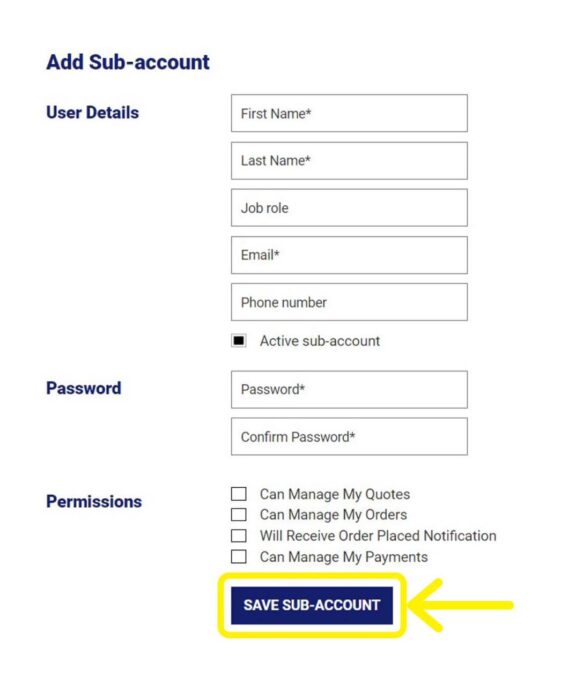
To add a Sub-account, click the ADD SUB-ACCOUNT button found on the left side of the Manage Sub-accounts page.
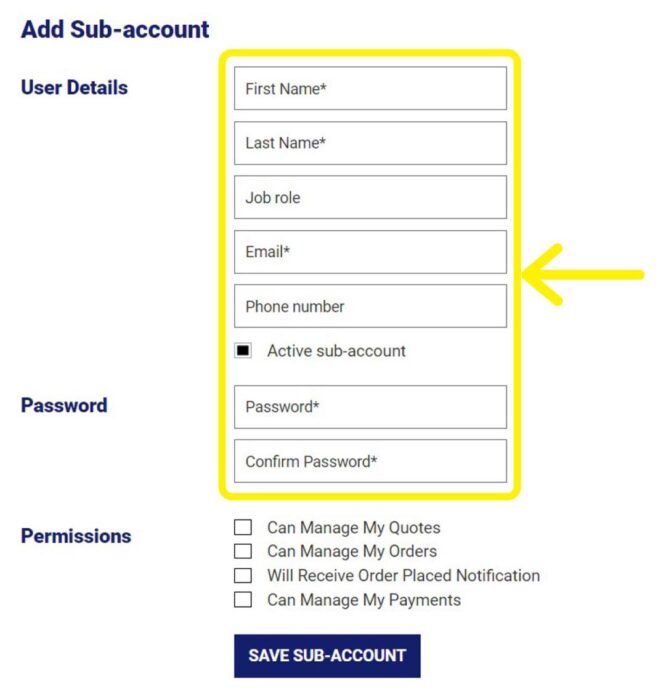
You’ll be redirected to a form where you’ll be required to add the User Details and create a Password. We recommend that you make a record of the password to send to the new user when you have created their account.
Step 3: Setting permissions
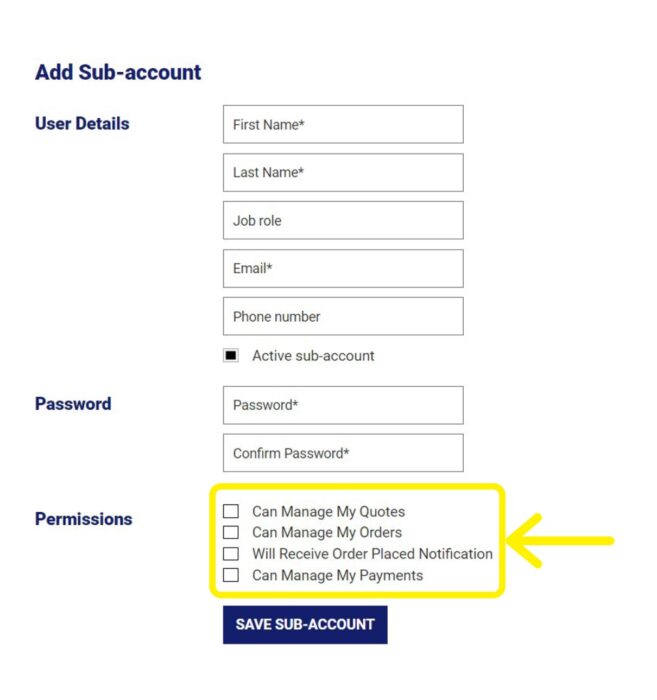
A convenient feature of Sub-accounts is that you decide on the level of Permissions that your team members have.
You can decide whether they can manage your quotes, orders or payments, or all of these tasks.
You can also give permission for the user to receive notifications when an order is placed. This can be useful for management of the project or to alert finance staff and other team members.
Step 4: Saving your changes
Save your newly created Sub-account or edits to an existing Sub-account by using the SAVE SUB-ACCOUNT button located under the form.
Step 5: Edit an existing Sub-account
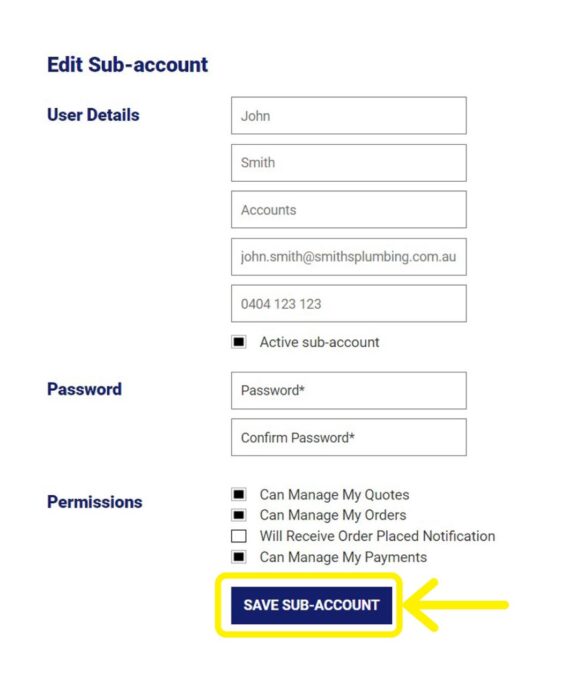
If you need to edit a Sub-account, use the Edit link located for that Sub-account, on the right side of the Manage Sub-accounts page.
This feature is useful if the Sub-account user has a change of title, contact details or permissions.
Remember to click SAVE SUB-ACCOUNT to save the changes.
Step 6: Log in to an existing Sub-account
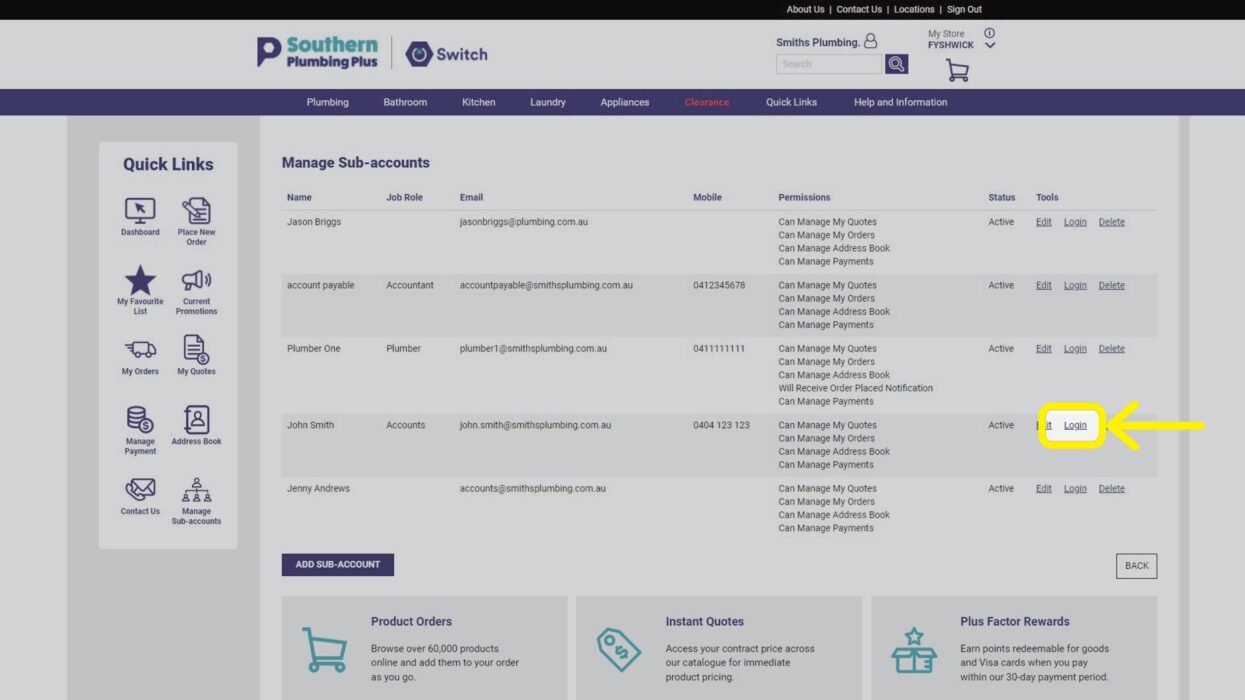
You may decide to log into a Sub-account of one of your team members. To do this, click on the Login link located for that Sub-account, on the right side of the Manage Sub-accounts page.
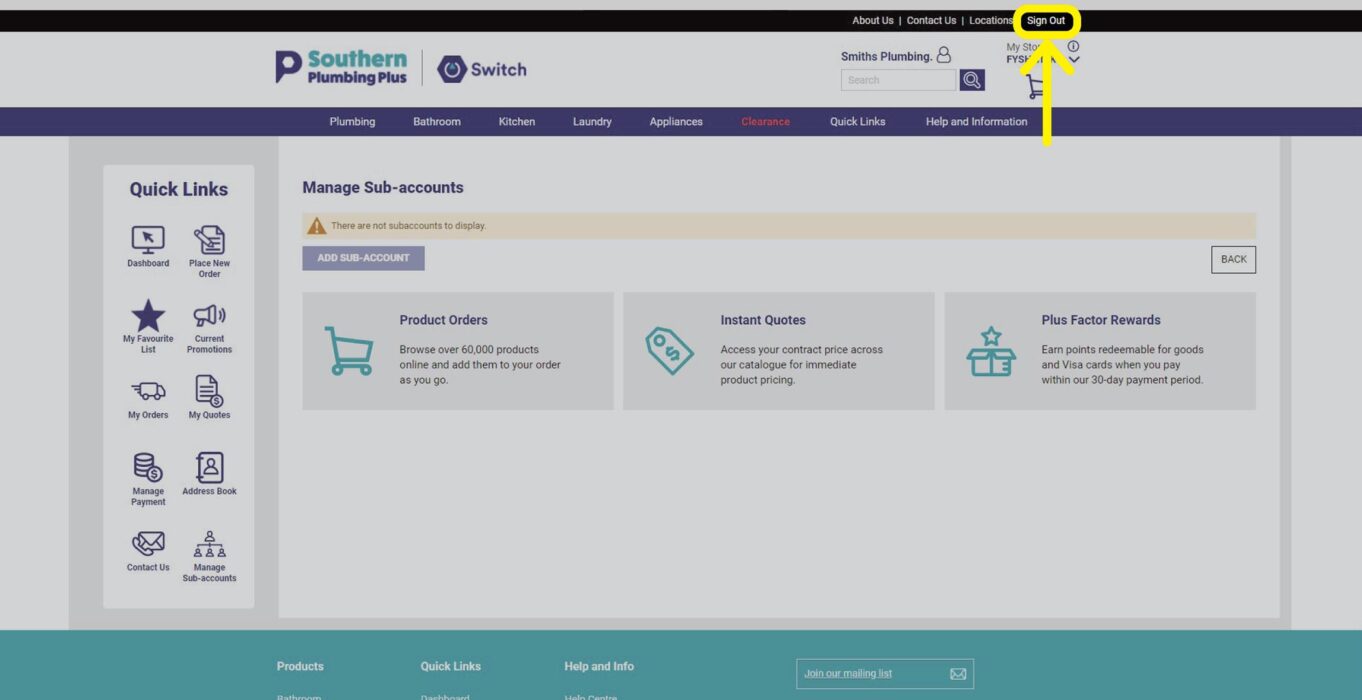
You will be automatically logged into that Sub-account, indicated by the user’s name at the top of the page. To switch back to your own Switch account you will need to Sign Out of the Sub-account and login to your account again.
The Sign Out link is located at the top right of the web page.
Step 7: Delete an existing Sub-account
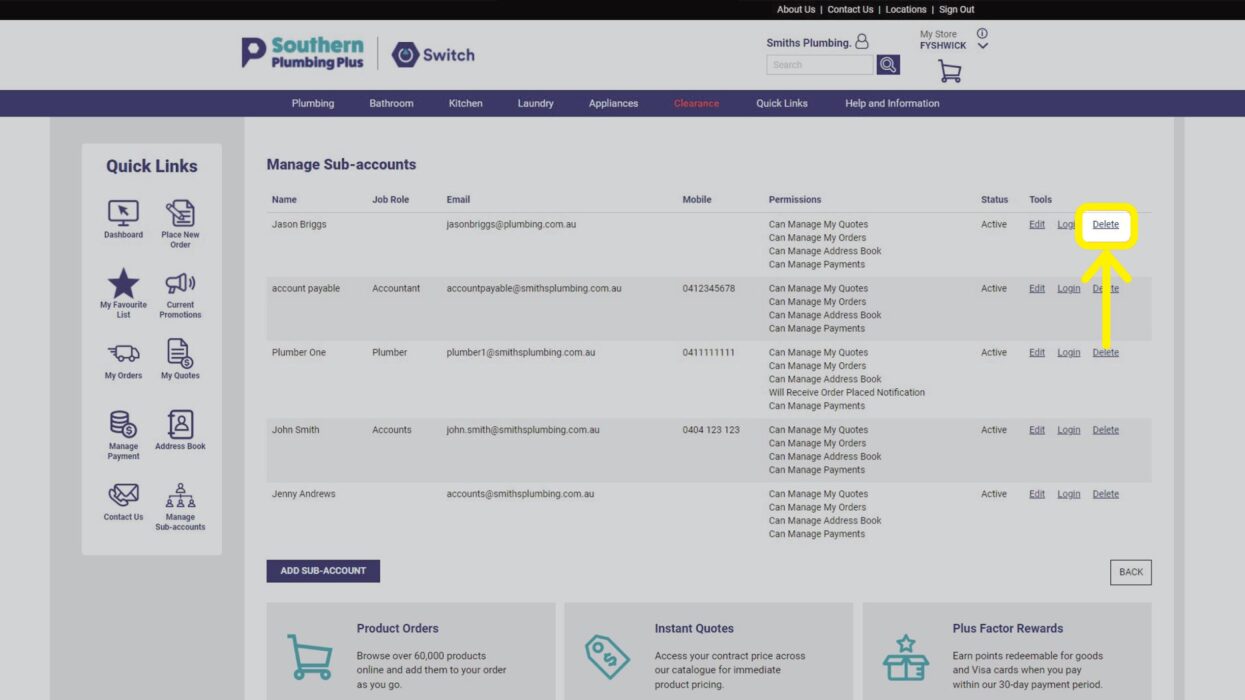
You may decide to delete a Sub-account. To do this, click on the Delete link located for that Sub-account, on the right side of the Manage Sub-accounts page.
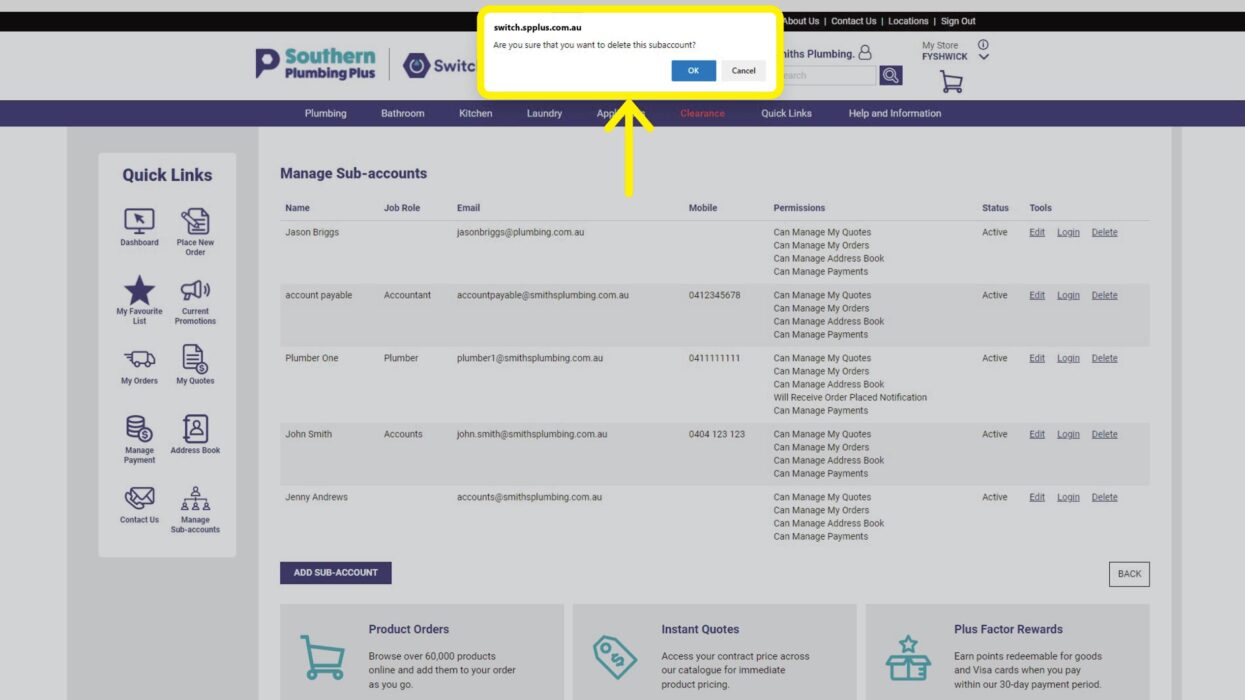
A pop-up window will prompted you to confirm that you wish to delete the Sub-account.
Need more help?
Phone or email our team and let us assist you.
02 6143 2680 • [email protected]
Visit the Help Centre
